Halloween is upon us and it’s the time of the year to indulge in the festivities and spook the world out. Donning scary costumes, throwing boo-bashes, and decorating houses with illuminated Jack-O’-Lanterns are quintessential Halloween fun. The tradition of carving pumpkins with ghoulish faces has its roots in the ancient Celtic festival of Samhain. Originated in Ireland, the practice earlier involved the carving of turnips, beets, and potatoes. As per Irish folklore, the veggies were hollowed out, carved, and illuminated to scare away Jack- the wandering evil spirit on All-Hallows’-Eve, the night before All-Hallows Day (All-Saints’ Day). Later, pumpkins replaced the turnips and potatoes, when Irish immigrants brought the custom to America and chose pumpkin as the canvas owing to its abundant availability.
As sculpting intricate designs on big round orange gourds were easier and much more fun, it gained popularity across Britain too. Ever since the illuminated squashes have been used as an indispensable part of Halloween decorations. Although carving a pumpkin seems pretty simple, its execution can be a bit tricky. So, here are some easy-peasy steps you can follow to hone your sculpting skills.
Choose your Right Victim

Before you cut and pierce through the delicate squash to produce the masterpiece pumpkin lantern, choose the right size and shape fruit. A medium-sized round squash with no deep ridges fits the bill for it’s easy to sculpt. Even though small, round ones are amusing to look at, they are a pain to carve. Only the fresh pumpkins make boo-tiful pieces of art, so choosing the fruit in its prime is important. Look for the gourd with the most staying potential. A solid to touch with a strong, sturdy green stem would do the trick. To make sure you’ve got a fresh one, shake it to hear liquid sloshing inside. You can even give it a sniff to check if it’s got a fresh aroma. As to maintain its freshness, keep it safe from direct sunlight once it’s home from the patch.
Avoid the pumpkins with blemishes, soft spots, or bugs. Go for light-skinned ones as gourds with dark skin can be tough to carve. Also, avoid the ones sold for cooking for they are fleshy with a small cavity which makes them harder to chisel.
Gather your Supplies/Tools

Carving seems a cakewalk when you have the right tools and supplies at hand. You can opt for knives, spoons, ladles, ice cream scoops, or melon ballers for scooping and scraping. To draw or trace the design keep a permanent marker, tracing paper, clear tape, pinpricks, and a fillet knife handy. You can even use Jack-O-Lantern carving kits containing typical scoops and serrated saws to attempt intricate designs.
Prep up your Workspace
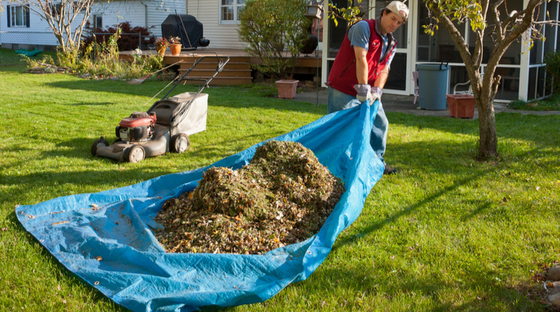
Before advancing with your carving spree, watch for the ideal space where you can go all messy. Pumpkin sculpting does entail scooping out messy squash glop, so better move outdoors. Prep up your workspace on your porch or patio. You can set up your workstation on the outdoor cart or on the centre table beside your sofa beautified with outdoor lifestyle covers. To ward off sludge, stains, and ooze of pumpkin stuff, first, line up your patio with custom tarps. Then, layer the tabletop with waterproof table covers (whichever you are using) to begin with your artistry.
Handle Sharp Tools with Care

Pumpkin carving and sharp tools go hand-in-hand. Unfortunately, the use of kitchen knives while carving can sometimes result in accidents. While some get minor injuries, others end up undergoing severe hand surgeries. To avoid turning the fun activity into something bad, it is recommended to use carving kits with tools specially designed for carving. As moisture causes your hands, pumpkin, or knife to slip, keeping a hand towel handy is important. If you are using a kitchen knife, make sure you cut away, not towards your hand. Also, start by making small controlled cuts only.
Choose a Better Canvas
With the right tools in your quiver, it’s time to execute your creative plan. Instead of chiseling out the top section of your pumpkin, create a square or diamond-shaped opening at the back to scoop the pumpkin guts and goop out. Thoroughly, remove the pumpkin flesh with the help of an ice cream scoop and start scraping the walls using the scrappers. The walls shouldn’t be thicker than 3/4 an inch. The thinner the walls, the better will be the ghoulish glow and the longer will be its shelf life.
Once, the squash is all hollowed out, it’s time to select the right canvas to carve the scary faces. Examine both sides of the orange gourd and choose the one with a smoother and softer surface. The side with no scratches, bruises, and dark spots fits the bill.
Etch your Spooky Design

Once you start carving, there’s no going back, so plan your design beforehand. If you are not confident with your drawing skills, go for a stencil. There are myriad spooky patterns on the internet to get your inspiration from. Just paste the print-out directly onto the pumpkin and use a needle or pin to prick the design in the squash. Alternatively, you can use a transfer paper and outline the pattern directly onto the gourd.
Once your monstrous grins are impeccably etched, it’s time to bring the fillet knife to follow your creative prowess. Gently pierce through the holes to get the carving started. Make sure, to keep your hands firm and stable during the whole process to sculpt a flawless piece of art.
Neaten up Your Jack-O-Lantern
Carving does entail a lot of patience and expertise. After successfully transferring the pattern onto the pumpkin, perfecting little nuances becomes harder as it tends to weaken the squash. Carefully go over the edges of the cut-outs with the help of a knife to smoothen out uneven cutting. During the process, if in case your pattern pieces fall off or break, fret not. You can easily fix them up using toothpicks.
Help your Ghoulish Grins Last Longer

Carved pumpkins make for stunning Halloween displays. But these displays lose their charm when they tend to shrivel in a few days. In order to retain their freshness and help them last longer, keeping them safe from dehydration, moisture, and mold (the main causes of the rotting process) becomes necessary. Try shading them from direct sunlight and protecting them from inclement weather with the help of custom tarps. Store them in the refrigerator. The application of petroleum jelly on its outer as well as inner surfaces helps seal the moisture and prevents them from decaying.
To further slow down the decaying process, you can even spray them with hairspray or clean them inside out with a bathroom cleaner containing bleach.
Make delectable dishes with Pumpkin Leftovers

Don’t throw away the pumpkin goop, seeds, and stringy stuff. Owing to their high nutritional value, they can be used to make delectable and healthy snacks and desserts. Separate the seeds from the pumpkin flesh and give them a thorough wash. Once they are dried, roast them in coconut oil. Season them with some salt and spices and you have the delicious snack to munch on.
For the pulp, you can roast and soften it to turn it into a puree and then use it to prepare some yummy cakes, ice cream, risotto, bread, pies, soups, and other Halloween recipes. You can even get creative with pumpkin skin. Bake or dehydrate the pumpkin peels and turn them into chips. Sprinkle some salt and savor them with a tasty dipping. You can also make tasty candies by dusting the dried-out pumpkin skin with cinnamon and sugar.
Deck the Jack-O’-Lantern with votive candles or tea lights

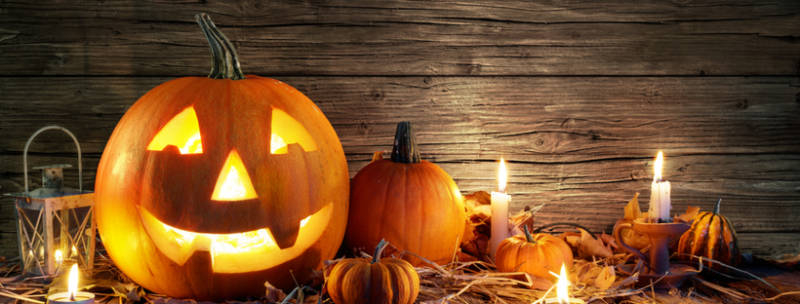
Give your Jack-O’-Lanterns a spooky glow and animate the carved characters. Place the pumpkin sculptures in the places with maximum visibility such as a patio or porch to spook out the trick-or-treaters. Place the votive candles or tea lights inside the pumpkins where the surface seems flat, not wobbly. You can even go for candle-free options to showcase your intricate designs. The colour-changing strobe lights, battery-operated tea lights, and rainbow LEDs also make for a great alternative for they are safer and won’t heat up the pumpkin.
Besides decking your front porches with Jack-O’-Lanterns, you can also render your interior space with a Halloween-y feel by incorporating the scary lanterns, hanging skeletons, faking bloodstains on/around the walls, and adding some custom tarps personalized with some creepy graphics. But, before that foolproof your house, furniture, and electronic devices with custom tarps, outdoor lifestyle covers, TV covers, and other insulated covers to ensure all-around protection amid the Halloween festivities.








Recent Comments